A few years ago, I made this for my nieces first birthday party. It was carnival themed, and outdoors. I came up with the idea from the monstrous amounts of mosquitoes on the property where the party was being held. This idea stemmed from a poor college students mind.
I basically wanted to find a cheap way to have anti bug candles without spending loads of money. You can buy citronella candles online in bulk for pretty cheap, so that’s exactly what I did. It’s less expensive then buying an already made candle, which can run anywhere from $5 and up.For this project, I ended up buying tea lights and votive citronella candles because I had different sized jars. I ended up spending only about $30 because I’m a crafter, and of course, had all the other supplies on hand. I collected jars over a couple of weeks and asked my family to save them for me. I used pickle jars, canning jars, baby food jars; basically any jars available. I made about 10-15 jars.
A couple of things to remember:
- Make sure the candles have citronella oil or scent in them. If they don’t, they will not repel bugs. Other scents such as mint, rosemary, or lemon work, but are not as effective.
- Never spend more than 25 cents per tea light candles. They should be cheap and you should be able to get a whole bunch for under $10.
- Votive candle are a little more costly, but last longer when lit. Look for one’s that last a a good number of hours. Mine last 10 hours.
- Shop around online! Don’t look in one place! Make sure you’re getting a good price.
- I’ve only had to change my candles once in the last 3 years and used them a fair number of times, so be aware, you will have left over candles for a while.
- My votive candles came molded together in squares because they melt in low heat. They’ll still be effective. I ordered them in July, so they melted for obvious reasons. This shouldn’t be an issue. Just break each off or grab a knife and cut them apart (always BE CAREFUL when using a sharp object and cut away from your body and fingers).
- If you so desire, and want to use these as a regular candle holder, you can. Just buy any scented candle or non scented you want and it works just as well.
Warnings:
- Always use care when lighting candles. Fire is HOT and can BURN you. Melted wax is also HOT and can BURN you.
- Although a lot packages say indoor/outdoor use. Citronella has an extremely strong scent, so I DO NOT recommend lighting them indoors if you are sensitive to strong smells. These candles are better used outdoors.
- DO NOT leave the finished product in the rain. Always store in a dry place. If the wick gets wet, it’s hard to light and you don’t want a jar full of water.
- The ribbon around the candles in the photo is for DECORATIVE use only. It will MELT if left on. You can use fake, battery operated candles if you want to make these for decoration.
Now that all the warnings are out of the way, we can get to the fun part.
Clean your jars with soap and water to get rid of any debris or sticky stuff from the label. Use oil or De-Solv-it (it works great) if necessary to get rid of the label sticky stuff.

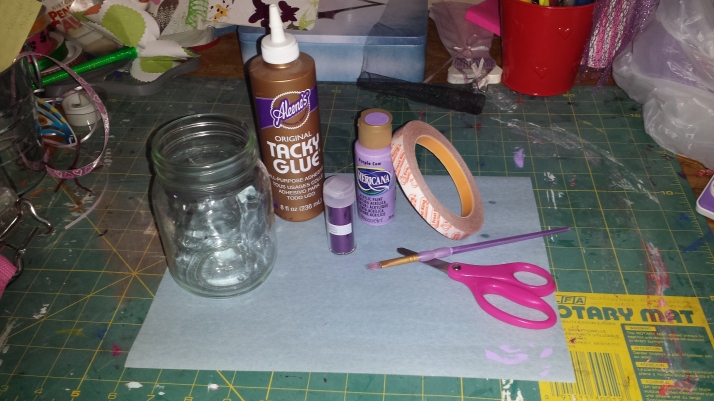
- Supplies: Strong double stick tape (1/2 inch size), glitter, paint and paint brush, scissors, large paper (for catching glitter), and clear drying glue. Because I wanted a vintage carnival look, I used acrylic paint. Acrylic paint scratches off of glass easily, so I had no problem creating the look I wanted. If you want a more solid look, I suggest using a paint geared toward glass or using a liquid sealer over the acrylic paint. All these supplies can be found in any craft store. Frost king makes strong tape. You can find it in a hardware store if your craft store doesn’t carry it.
You can start with Step 1 or 2 first. Whatever your comfort level is, either one can be done 1st.
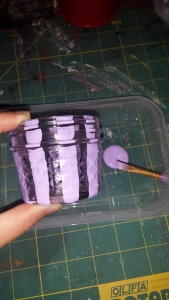
Step 1 (or 2): Paint the lines on the jar, skipping spaces, creating a striped pattern. 2 coats if desired. Allow time to dry, about 20-30 min. If you paint the entire thing, the tape doesn’t stick. Alternately, you can do Step 2 first, then paint the jar for straighter lines.

Step 2 (or 1): Add the double stick tape to the areas not painted. The best way to do this, is to not cut and guess what size you need. Just start at the bottom of the jar, leaving about a half an inch over the edge (as in the picture below) and work your way to the mouth, with the tape still on the roll. At the mouth, cut the tape to the edge of the glass. Fold the tape to the bottom of the jar. Alternately, you can cut against the edge of the bottom to get rid of the excess tape. If the tape doesn’t stick well in some places, just add a little bit of glue to keep it on.
Step 3: Peel off the tape protector. If desired and you started with Step 2 first, after you peel the protector off, you can paint the lines and the bottom of the jar to hide the tape. Allow the paint to dry before moving on to Step 4.

Step 4: Get your glitter on! Add glitter to the tape. Don’t roll the jar in glitter, as this can cause your tape to stick to whatever is under the glitter, such as the paper. Pour or sprinkle it on. Brush off an excess with your fingers or a soft brush.
Step 5: Add the candles. For the big jars I added at least 3 votive candles because that’s how many fit (make sure they sit flat to the bottom of the jar and not on top of each other). They melt together nicely to create 1 giant candle. For the baby jars, I used the tea lights. For the mediums, I used 1 votive.
Again: Don’t leave the ribbon on, it melts.


